Take your case management and people analytics to the next level with the FaceUp + Rippling integration.
Seamlessly sync your Rippling employee data with FaceUp to streamline anonymous reporting, case management, and insights. Automatically connect your workforce so that when a new case is submitted, you can easily assign involved employees, analyze participation, and filter cases by individual for deeper visibility.
You can also send targeted surveys directly to your Rippling employees — making it effortless to gather feedback, measure engagement, and follow up on specific issues.
In this article, you’ll find:
-
Setting up the integration & Rippling SSO Setup
-
Key benefits
-
Data security & Managing the integration after setup
Setting up the integration
Getting started is simple. Follow these steps to complete the setup:
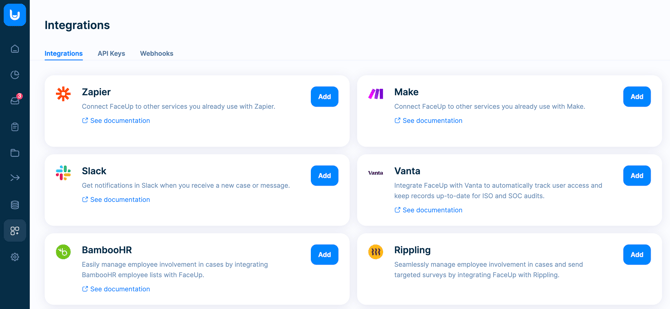
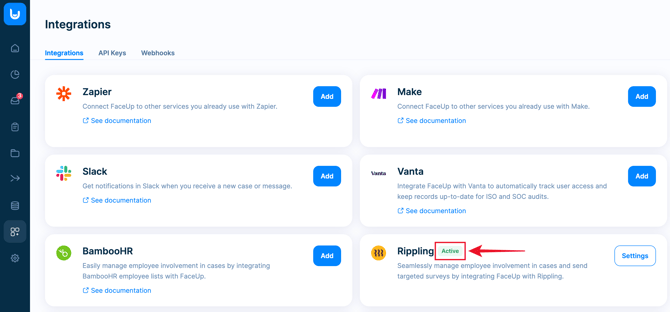
1. In your FaceUp account, navigate to the Integrations sections. Alternatively, you can install the integration directly from the App Shop in your Rippling account.
2. Click the Add button on the Rippling integration.
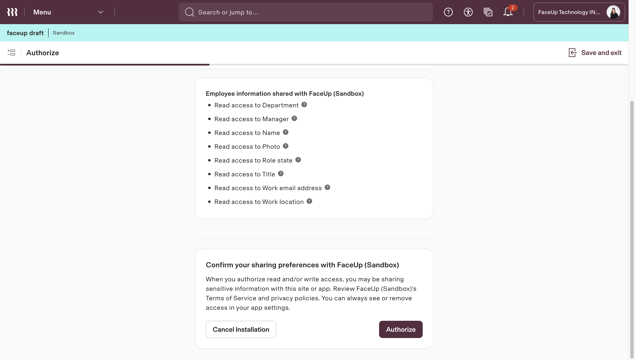
3. You’ll be redirected to your Rippling account, where you’ll need to authorize the FaceUp integration.
Click Authorize in the bottom-right corner to continue.
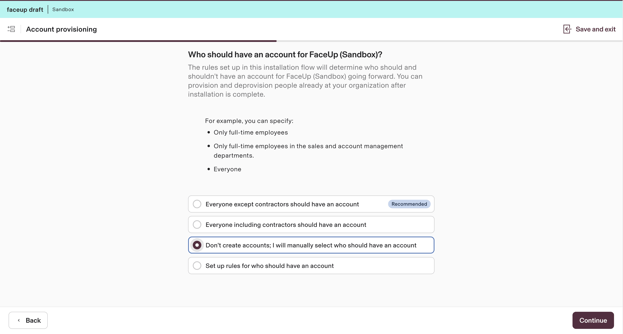
4. As the next step, choose the account provisioning setting, which determines who in your company will have access to the FaceUp & be automatically synced as an employee in your company’s account.
⚠️ Important: We highly recommend selecting the Recommended “Everyone except contractors should have an account.”
Otherwise, it means that employees won’t be synced into the Employee Data section, and you won’t be able to track their involvement in cases or suggestions, and send them anonymous surveys.
You don’t need to worry about giving everyone admin access — they’ll only gain access to a limited FaceUp account, where they can view their assigned cases, access the reporting form, but won’t have any admin or editing rights.
Once you’ve selected the correct setting, click Continue.
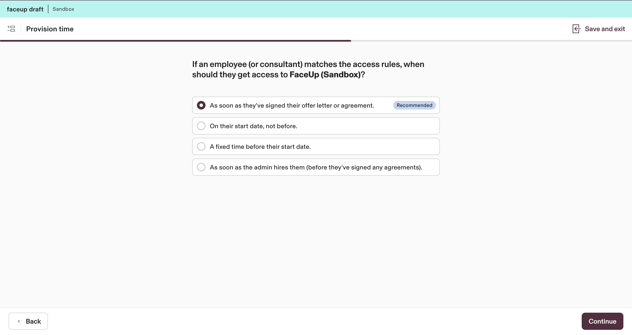
5. Then, select the provisioning time — meaning when an employee (or consultant) who matches the selected access rules should receive access to FaceUp. Once selected, click Continue.
6. Next, you will connect your FaceUp account to Rippling. Click Continue, and log in if prompted.

Great job! You’ll be redirected back to your FaceUp account.
The integration between FaceUp and Rippling is now successfully set up, and your employee data will begin syncing automatically.
Rippling SSO Setup
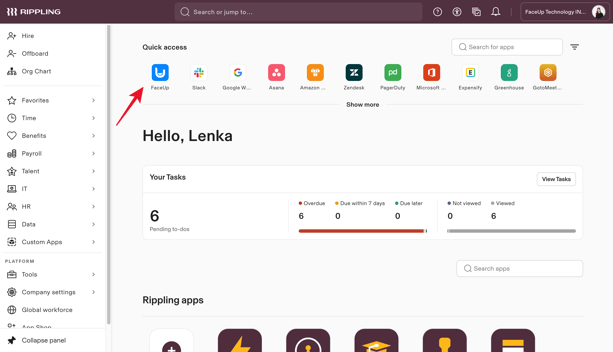
The FaceUp integration also includes Rippling SSO support. This means that users you grant access to can log in to FaceUp with a single click, directly from Rippling. They’ll only see cases assigned to them and won’t have any admin or editing rights.
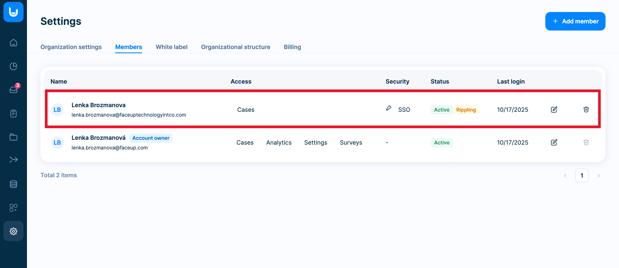
As soon as a user accesses the FaceUp app through the quick access tile, they’ll be automatically granted access to FaceUp, and you’ll see them listed as a new member in the Members section under Settings (visible to admins).
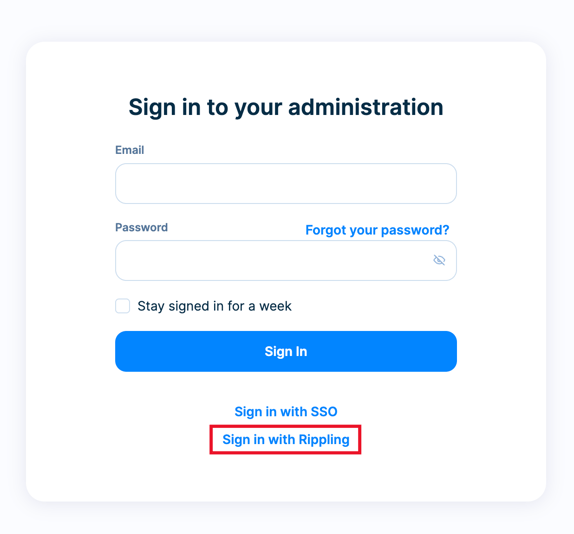
They will also be able to sign in with Rippling in the FaceUp log in page.
Important note: When a user logs in to FaceUp using the SSO tile, their account will be linked to that FaceUp workspace.
They won’t be able to join another workspace with the same login until they’re removed from the first FaceUp account as a member.
SSO Activation Email
Once Rippling integration is enabled, all existing users in your FaceUp administration, except account owner, will receive an email titled “Rippling enabled.”
This confirms that:
-
Rippling is now the login method for your organization.
-
Your account needs to be migrated.
-
You will sign in to FaceUp using your Rippling account going forward.
If needed, contact support@faceup.com for assistance.

Important: The Rippling integration includes Rippling SSO as part of the setup and cannot be used without it.
All your existing FaceUp users will receive the “Rippling enabled” email once the integration is activated. If they do not migrate to Rippling SSO, they can continue using the standard login method (email and password).
However, all users created after the Rippling integration is enabled will be required to log in via Rippling SSO.
Once the Rippling integration is enabled, it is not possible to use other SSO providers (e.g. Google) in parallel to access FaceUp.
Key Benefits: Working with Rippling Employee Data in FaceUp
Now that the integration is set up, let’s explore how you can utilize your employee data within your FaceUp account. If you go into the Data management section in FaceUp, you'll see that there's a new "Employees" section. You can work with the data in several different ways.

1. Assigning employees and tracking their involvement in specific cases
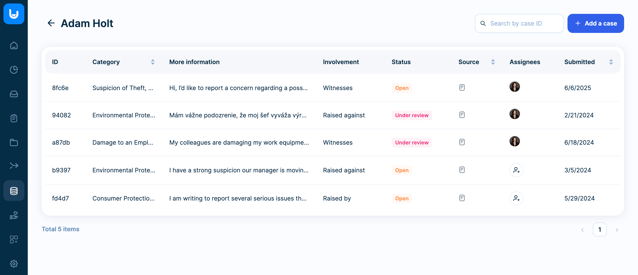
The integration allows you to assign specific employees to cases and track their involvement in each case. To get started, go to the Reports section in the FaceUp administration.
Select the case you want to work with. Once opened, you’ll see a new section on the right side labeled Involved Employees. Here, you can add employees associated with the report.

Adding an employee to a specific case is simple. First, select the employees involved in the case from the dropdown menu. Next, choose their involvement type:
- Raised by
- Raised against
- Witnesses
When finished, click Send to associate the employees with the case.
Note: Once an employee is associated with a case, they will not receive any notifications and will not be informed of their involvement.

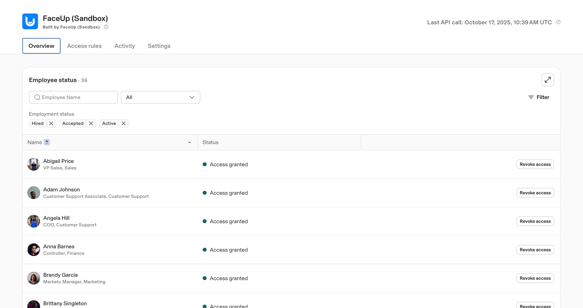
2. Analyzing employee data and viewing cases associated with specific employees
Another useful feature is the ability to view a list of employees in FaceUp and see details for each specific employee, such as the number of cases they’re associated with and their type of involvement.
To access this, navigate to the Data Management section in FaceUp and click on the Employees tab. Here, you’ll see a list of all employees synced from Rippling.
Select an employee to view a list of all cases they are involved in, along with case details. You can also click on any rcase to go directly to its detailed view.
If you want to quickly view cases associated with a specific employee without searching through the full employee list in the Data Management section, you can use the filter option in the Cases section.
Just click on Filter, select the People filter, choose the employee you’re looking for, and click Filter. You’ll then see a complete list of cases/reports associated with that employee.


3. Sending Anonymous Employee Surveys to Rippling-Synced Employees via FaceUp
This integration allows you to easily send FaceUp surveys to your Rippling-synced employees. You can choose to send a survey to all employees or target specific individuals.
To send a survey to your Rippling employees:
-
In your FaceUp administration, navigate to the Surveys section and select the specific survey you want to distribute. If you don’t have a survey created yet, click the New Survey button to set one up.
-
Once your survey is ready, you’ll need to publish it. After that, open the survey and click the Share button, then choose the Share via email option.

-
In the email setup, you can define the From name, choose which employees will receive the survey, and customize the button text (the call-to-action). Once done, click Continue to review the email summary.

-
Double-check everything and, when ready, click Confirm and Send.

And that’s it! Your employees will receive an email prompt to complete the survey, and you can track their responses directly in FaceUp.
Data security & Managing the integration after setup
You can manage access — meaning who has basic FaceUp account access and is synced as an employee into the Employee Data section — directly in the integration settings in Rippling.
You can also edit or adjust access rules & account provisioning within Rippling at any time.
As mentioned earlier, employees who have access will never have admin or editing rights. They are only synced and given basic access so that you can track their involvement, send them surveys, and they can access the reporting form directly from Rippling.