
Step 1: Configure the Application in Okta
- Log in to your Okta account and navigate to the Admin Console (click the Admin button in the top right corner).
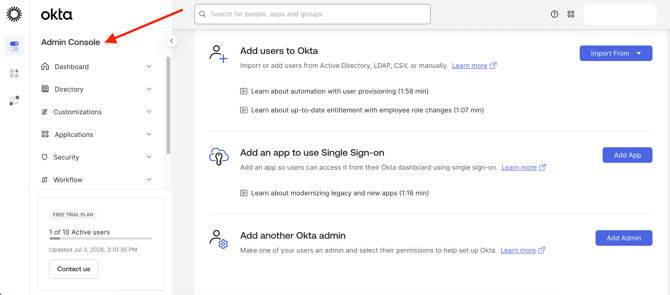
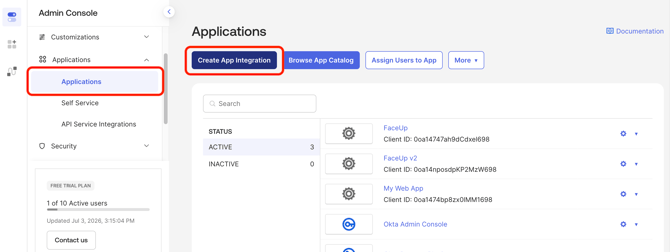
- In the left-hand menu, go to Applications and select Applications from the dropdown.
- On the Applications page, click the Create App Integration button.
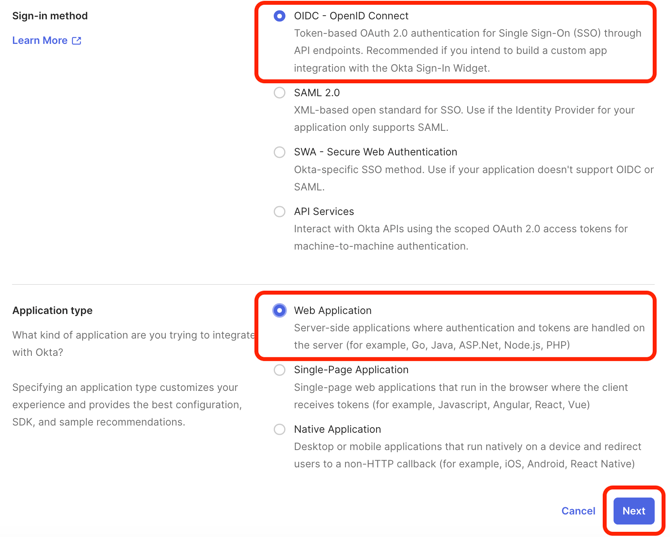
- In the pop-up window, select OIDC - OpenID Connect as the Sign-in method.
- For the Application type, select Web Application, then click Next.
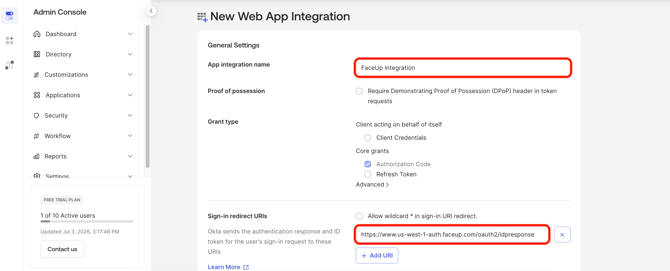
- Give your integration a name (e.g., FaceUp Integration).
- Set up the Sign-in redirect URIs: In this field, paste the specific URL based on where your data is hosted:
- https://www.auth.faceup.com/oauth2/idpresponse (for EU data hosting)
- https://www.us-west-1-auth.faceup.com/oauth2/idpresponse (for US data hosting)
- https://www.me-central-1-auth.faceup.com/oauth2/idpresponse (for UAE data hosting)
- https://www.ap-southeast-2-auth.faceup.com/oauth2/idpresponse (for AUS data hosting)
- If you don't know the location of your data, you can find the information in the FaceUp administration in the Settings -> Organization settings.
- You can leave the Sign-out redirect URIs field as is, or ideally, leave it blank.
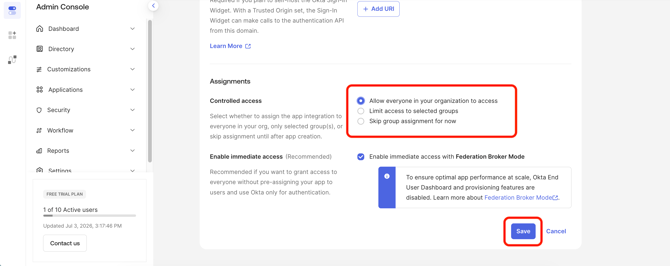
- In the Assignments section, choose who will have access to the app. To allow your entire organization to log in, select Allow everyone in your organization (or restrict access based on your needs).
- Click Save to complete the initial setup.
Step 2: Retrieve your credentials
Your Okta application is now ready. To connect it with FaceUp, you will need to copy three key pieces of information from the application's detail page:
- Client ID: Located right on the main General tab under the Client Credentials section.
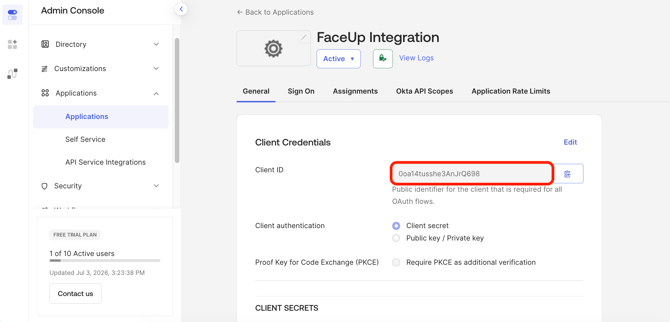
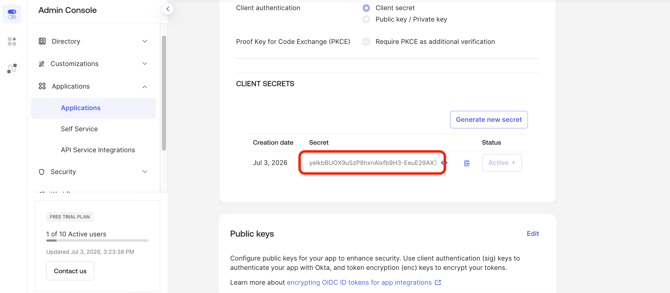
- Client secret: Located in the Client Secrets section directly below the Client ID.
- Provider URL: Click on your account menu in the top right corner. You will see your organization domain (e.g.,
XXXXXXX.okta.com). Click the copy icon next to it. When pasting this into FaceUp, make sure to format it as a full URL by addinghttps://at the beginning (e.g.,https://XXXXXXX.okta.com).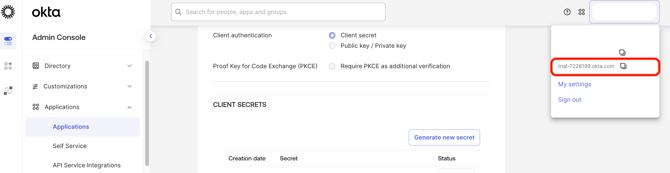
Step 3: Complete the configuration in FaceUp
- Log in to your FaceUp administration.
- Go to Settings -> Organization settings.
- Locate the Single sign-on card.
- Toggle the SSO switch to Enabled.
- Fill in the fields with the credentials you copied from Okta (Client ID, Client secret, and Provider URL).
- Click Save to apply the changes.