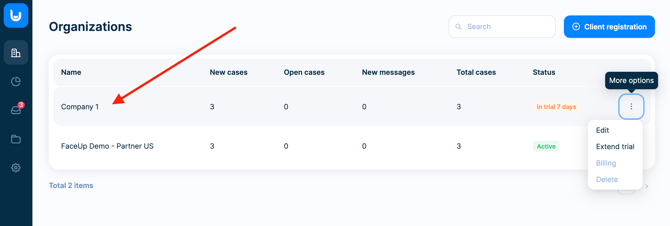
Once the organization is created:
- The 7-day free trial starts automatically.
- You can immediately access and manage the workspace.
- You can invite additional members and begin configuring the account.
- Your client can start using FaceUp right away.
If your client needs more time for testing, onboarding, or internal approval processes, the free trial period can also be extended directly from the partner administration.
This makes it easy to onboard new customers quickly and prepare their whistleblowing, compliance, or HR environment without delays.
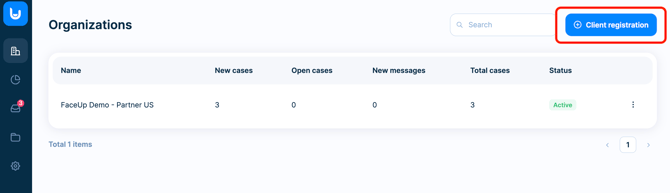
1) Open the Organizations section
In the navigation bar, click the Organizations icon to open an overview of all your client organizations.
To create a new client organization, click the Client registration button in the top-right corner.
2) Fill in the organization details
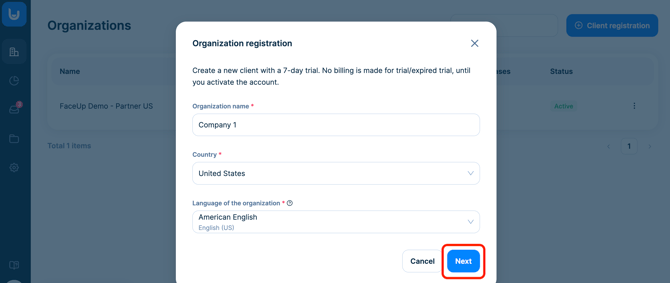
After clicking Client registration, you’ll see the registration form.
Here, enter:
- Organization name.
- Country where the organization is based.
- Default language for the workspace.
These settings help preconfigure the organization for the client’s preferred region and language experience.
3) Select the subscription setup
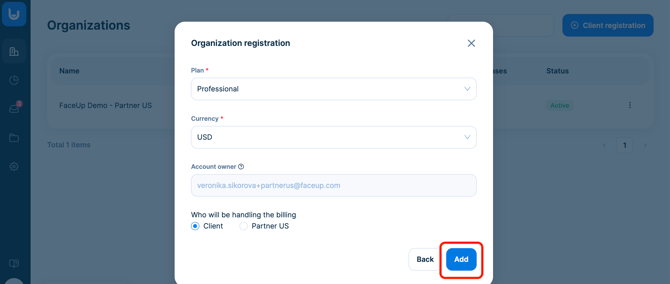
In this step, you’ll configure the organization’s subscription and billing details, including:
- Subscription plan.
- Billing currency.
- Invoice recipient.
If you manage billing on behalf of your clients, you can also enter or edit your own billing details during this step.
The selected billing currency cannot be changed after the organization is created, so we recommend reviewing it carefully before continuing. The subscription plan and invoice recipient can still be updated later in the organizations overview.
This setup allows you to fully prepare the organization before handing it over to the client.
4) Finish the registration
Click Add to confirm and create the new organization.
5) Manage your organizations
After creating an organization, you’ll see it in your organization overview. From here, you can:
- Open the organization's workspace.
- Manage subscriptions or extend the trial period.
- Create additional client organizations.